8.4 Create an R markdown document
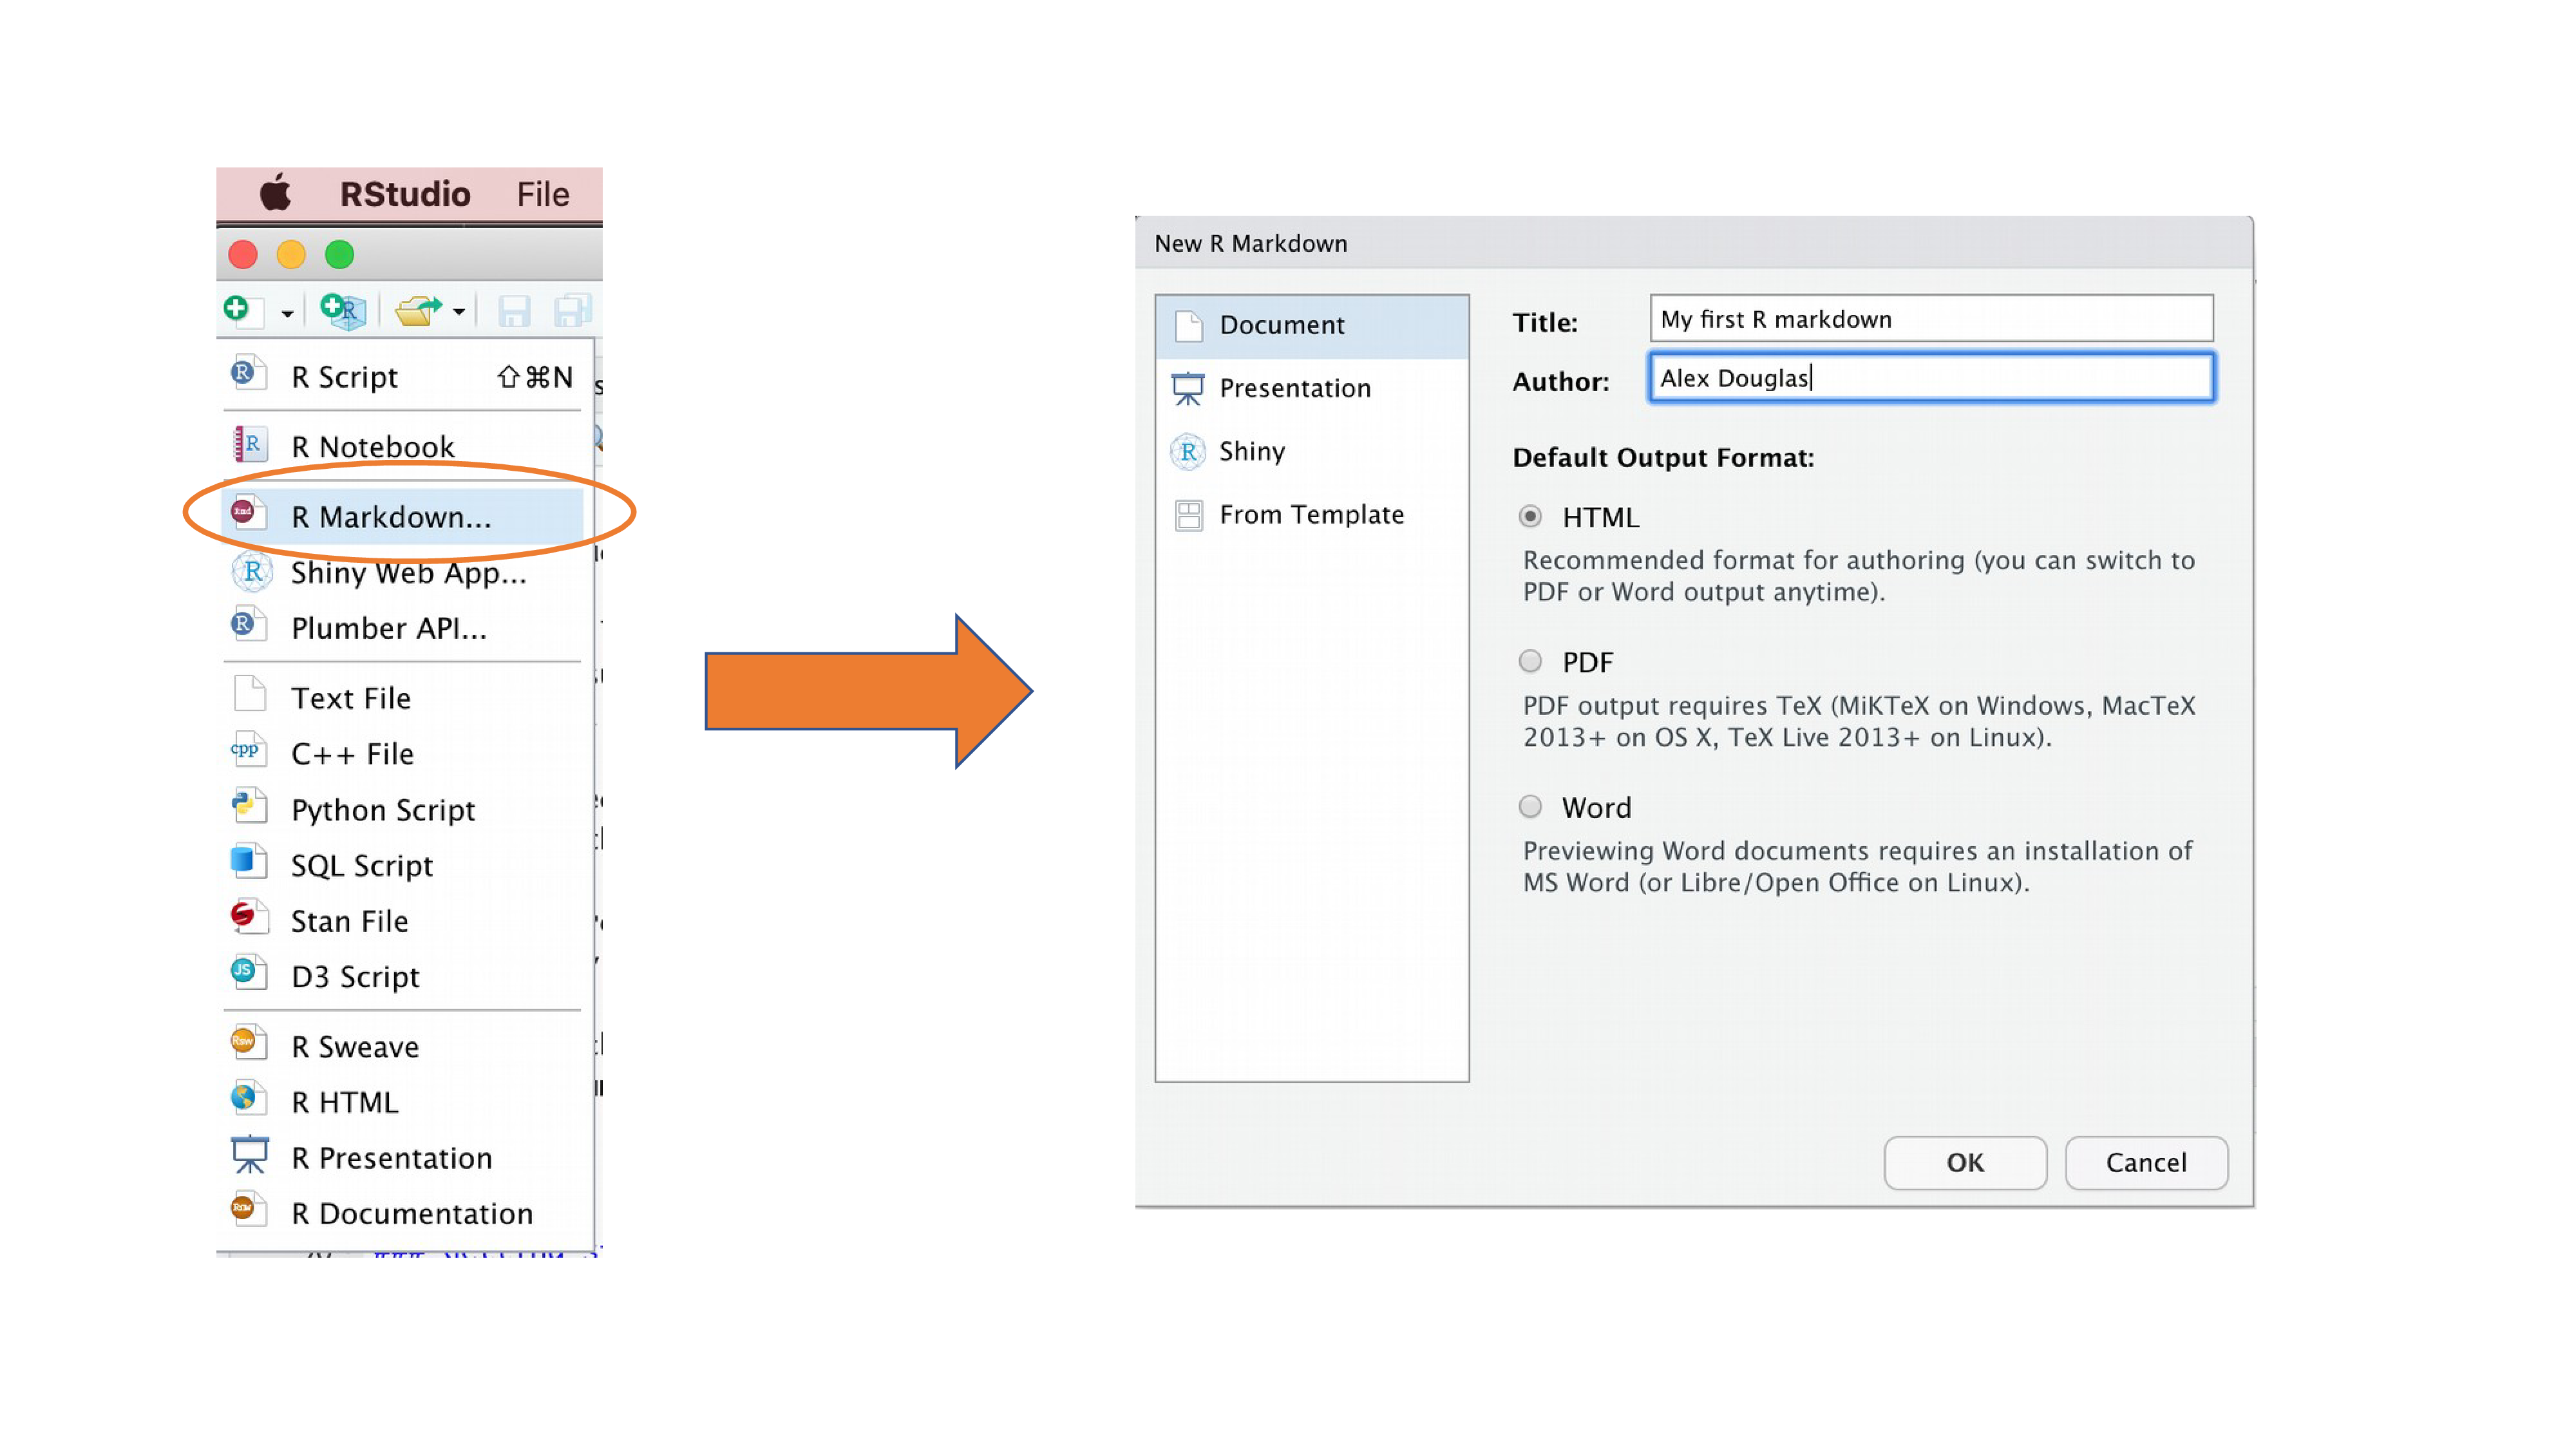
Right, time to create your first R markdown document. Within RStudio, click on the menu File -> New File -> R Markdown.... In the pop up window, give the document a ‘Title’ and enter the ‘Author’ information (your name) and select HTML as the default output. We can change all of this later so don’t worry about it for the moment.
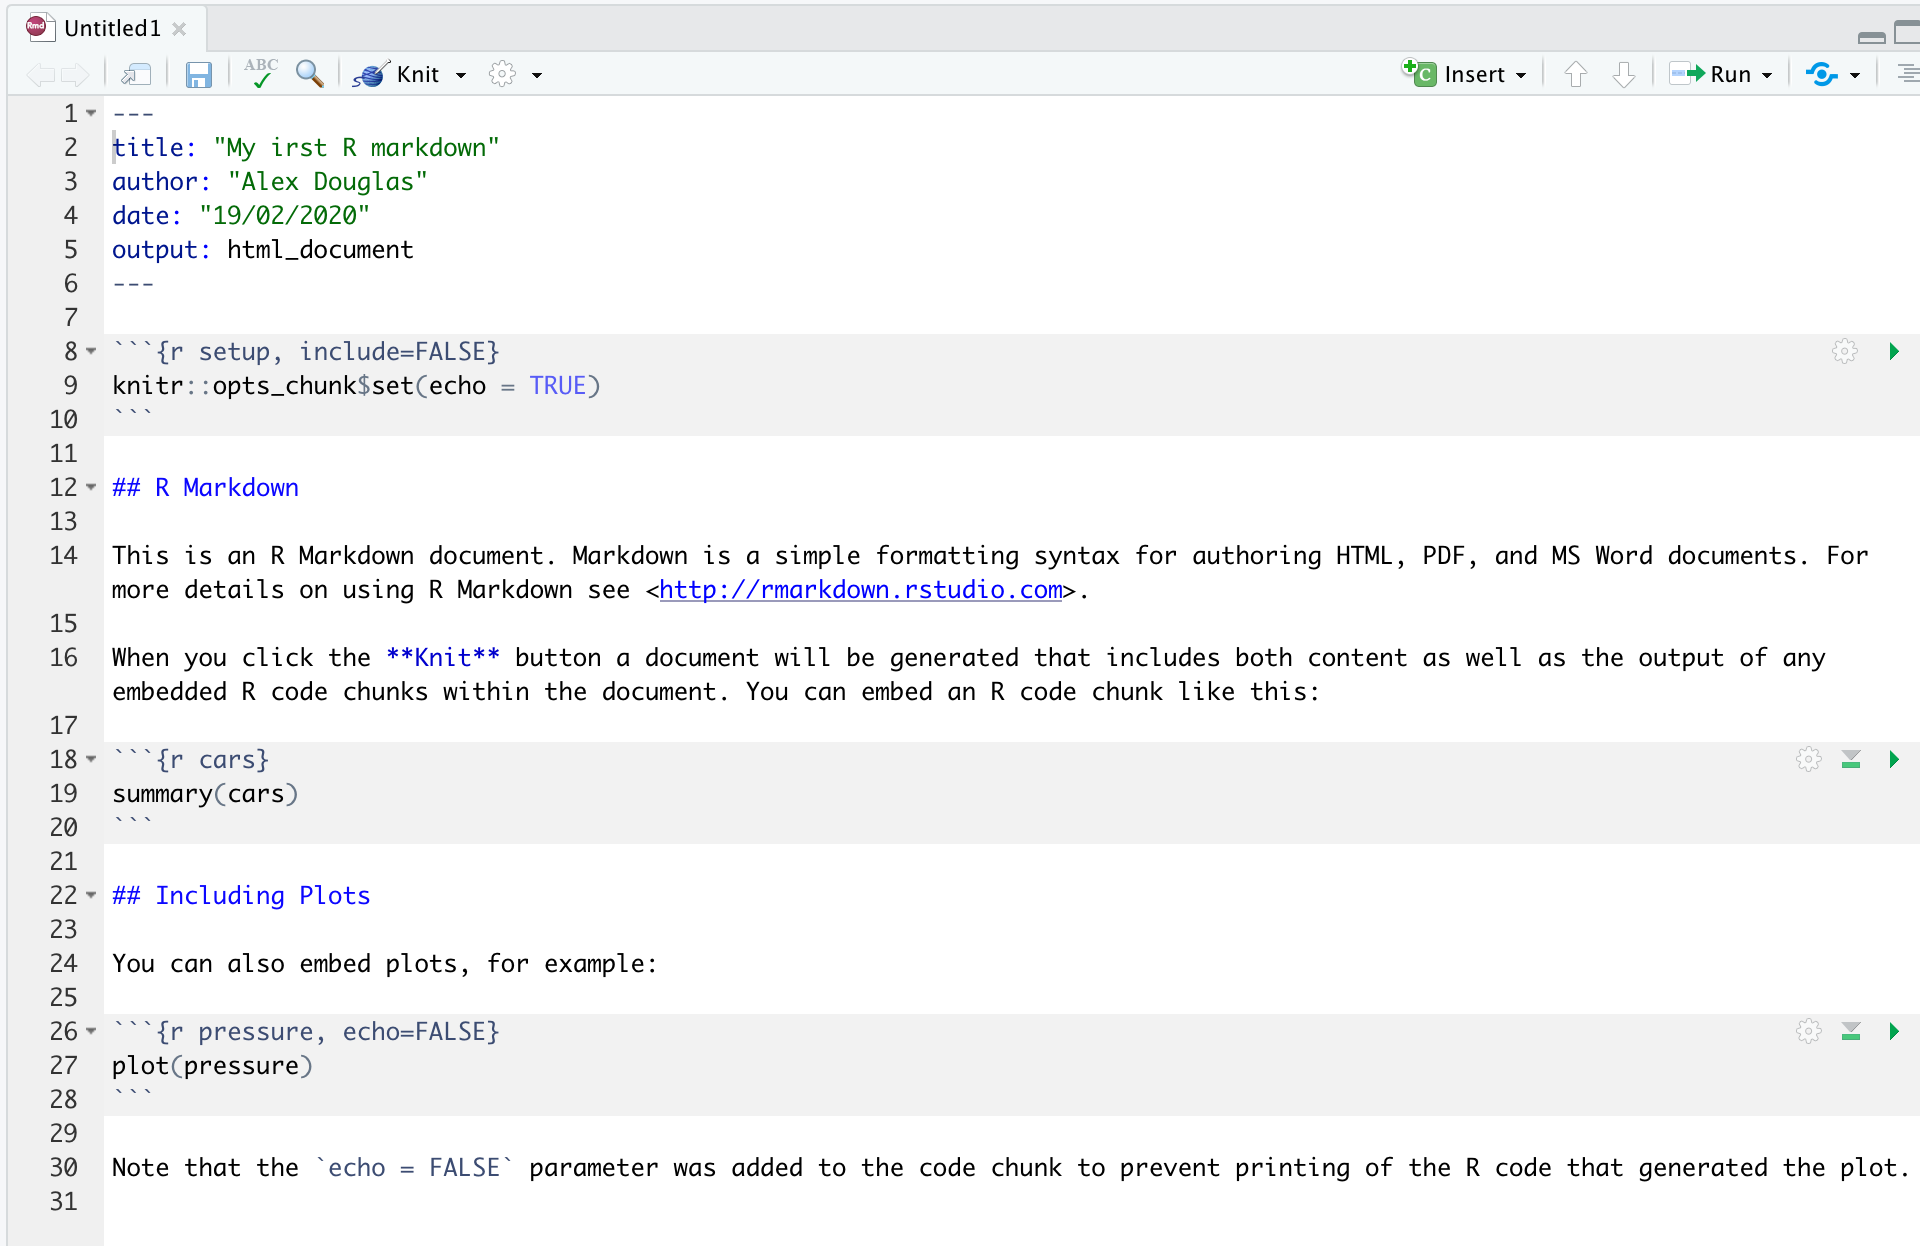
You will notice that when your new R markdown document is created it includes some example R markdown code. Normally you would just highlight and delete everything in the document except the information at the top between the --- delimiters (this is called the YAML header which we will discuss in a bit) and then start writing your own code. However, just for now we will use this document to practice converting R markdown to both html and pdf formats and check everything is working.
Once you’ve created your R markdown document it’s good practice to save this file somewhere convenient. You can do this by selecting File -> Save from RStudio menu (or use the keyboard shortcut ctrl + s on Windows or cmd + s on a Mac) and enter an appropriate file name (maybe call it my_first_rmarkdown). Notice the file extension of your new R markdown file is .Rmd.
Now, to convert your .Rmd file to a HTML document click on the little black triangle next to the Knit icon at the top of the source window and select knit to HTML.
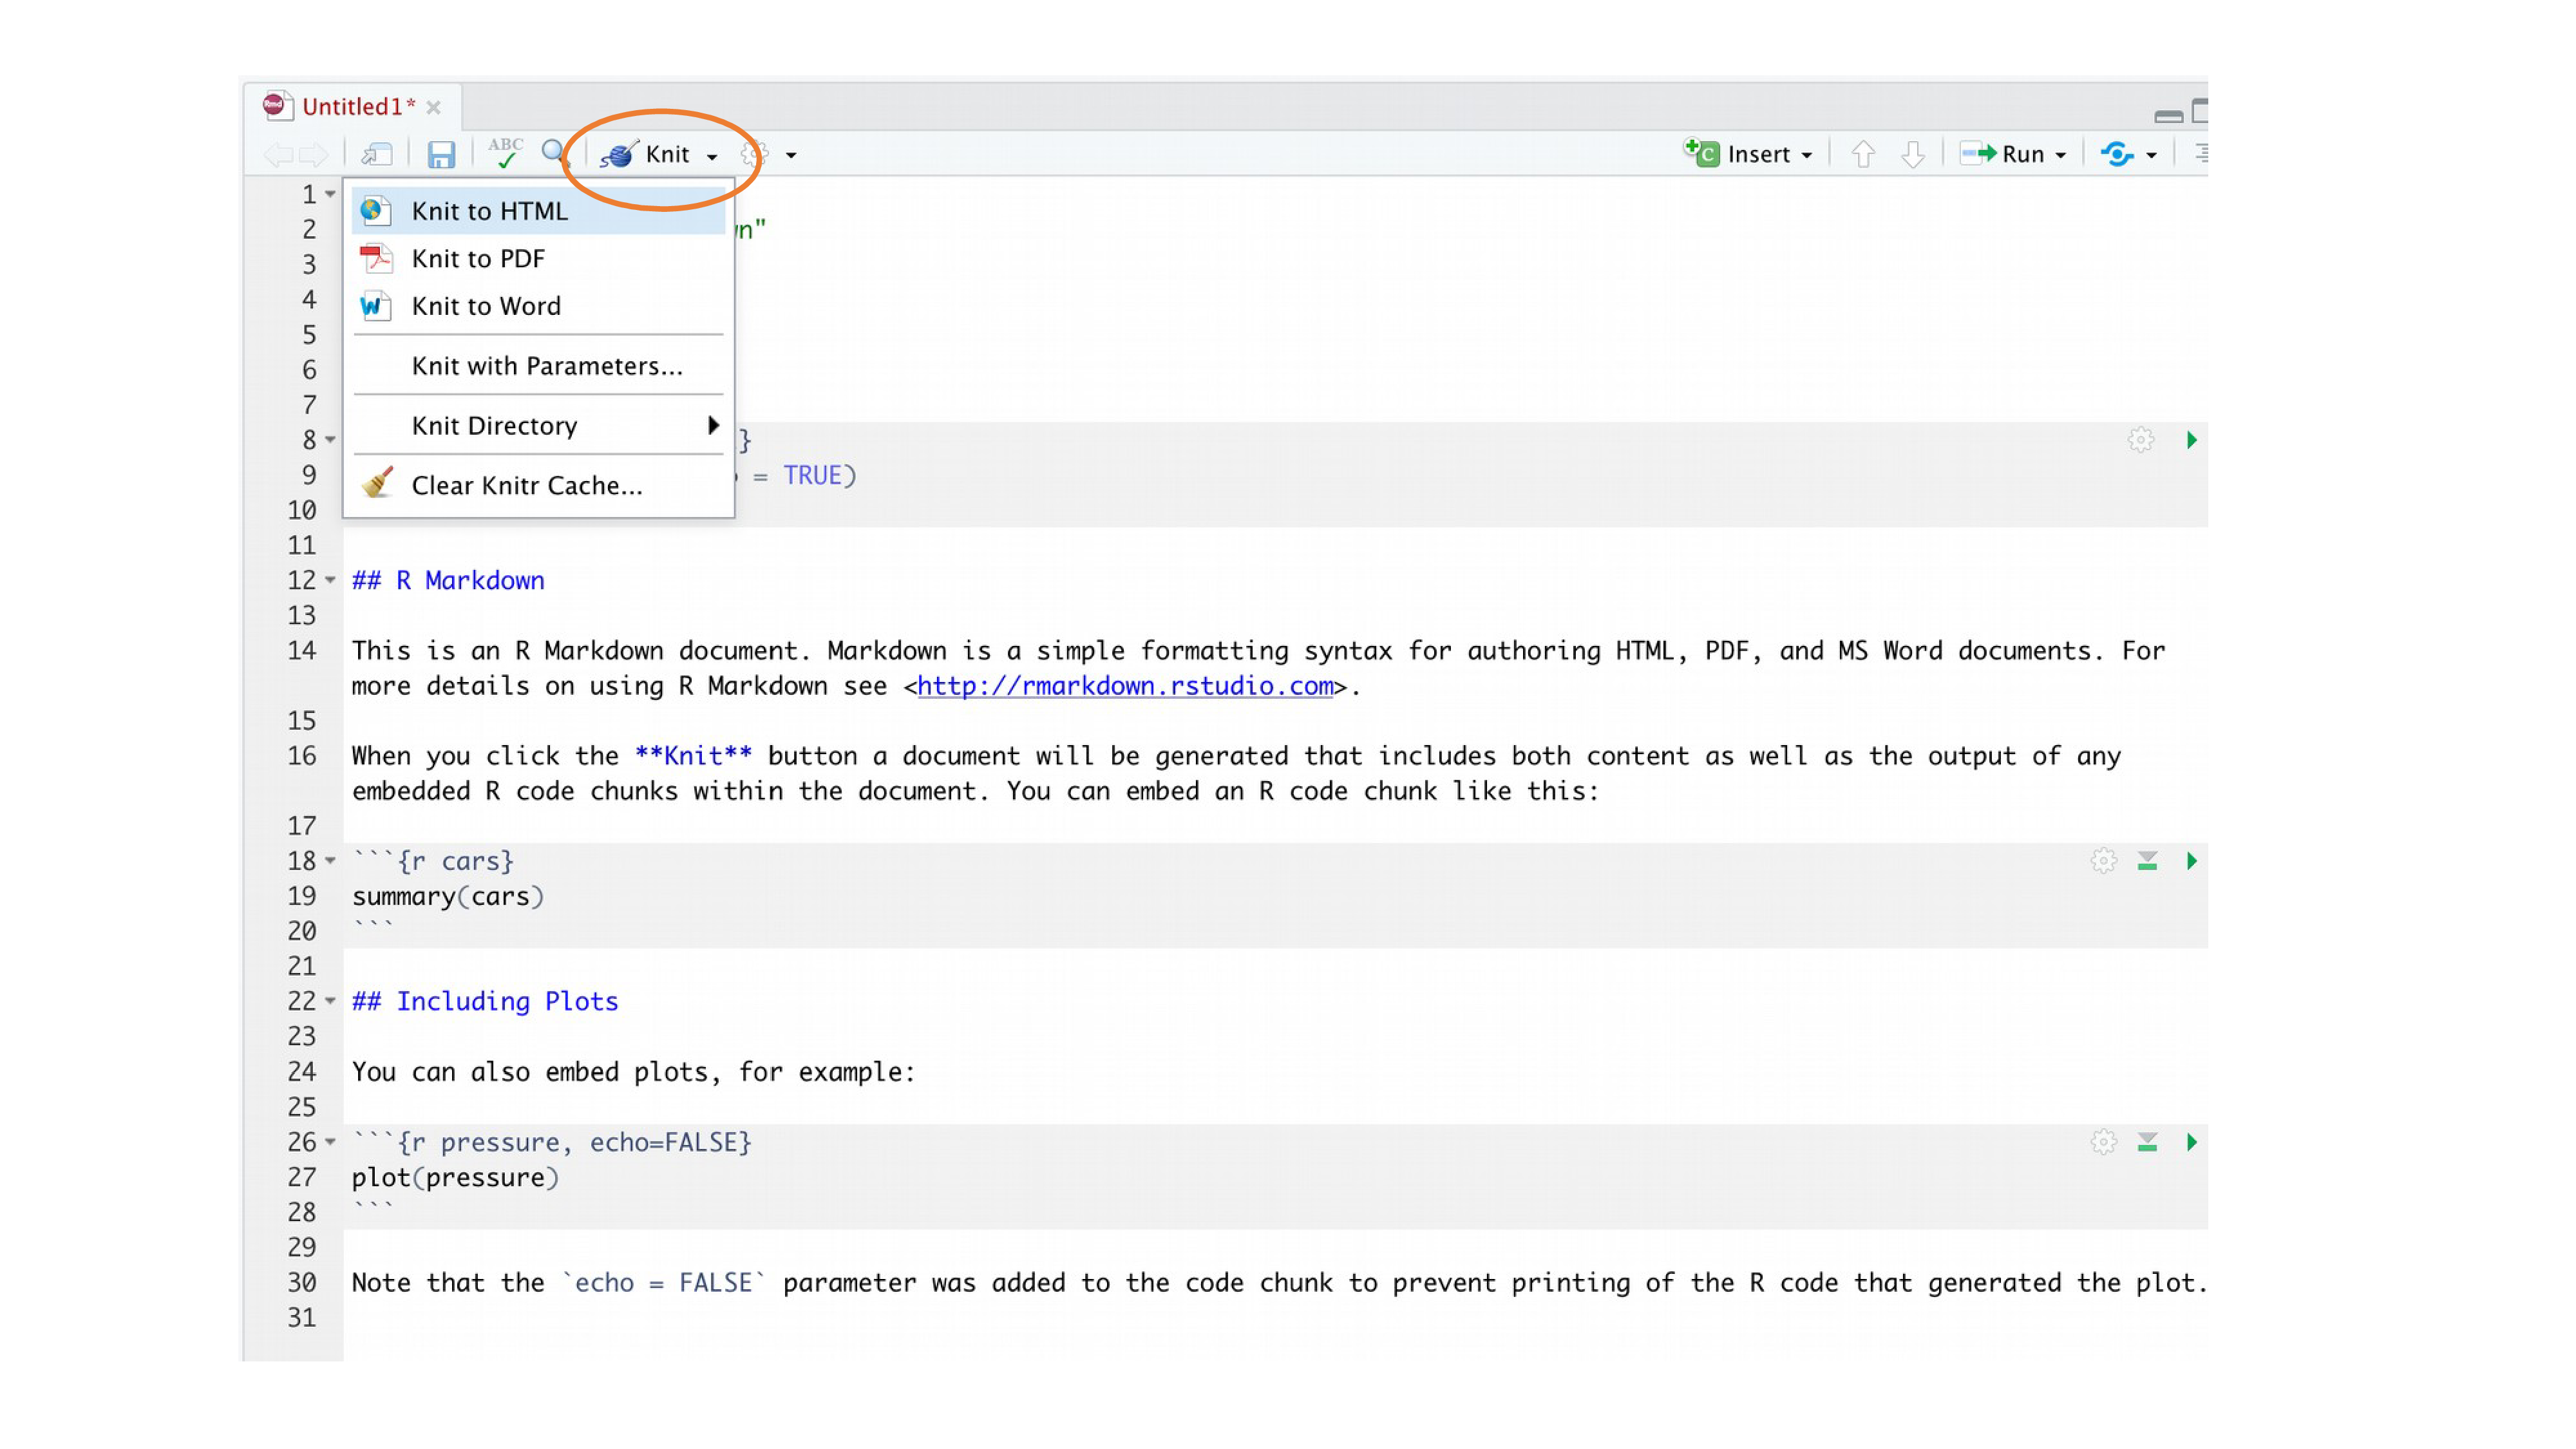
RStudio will now ‘knit’ (or render) your .Rmd file into a HTML file. Notice that there is a new R Markdown tab in your console window which provides you with information on the rendering process and will also display any errors if something goes wrong.

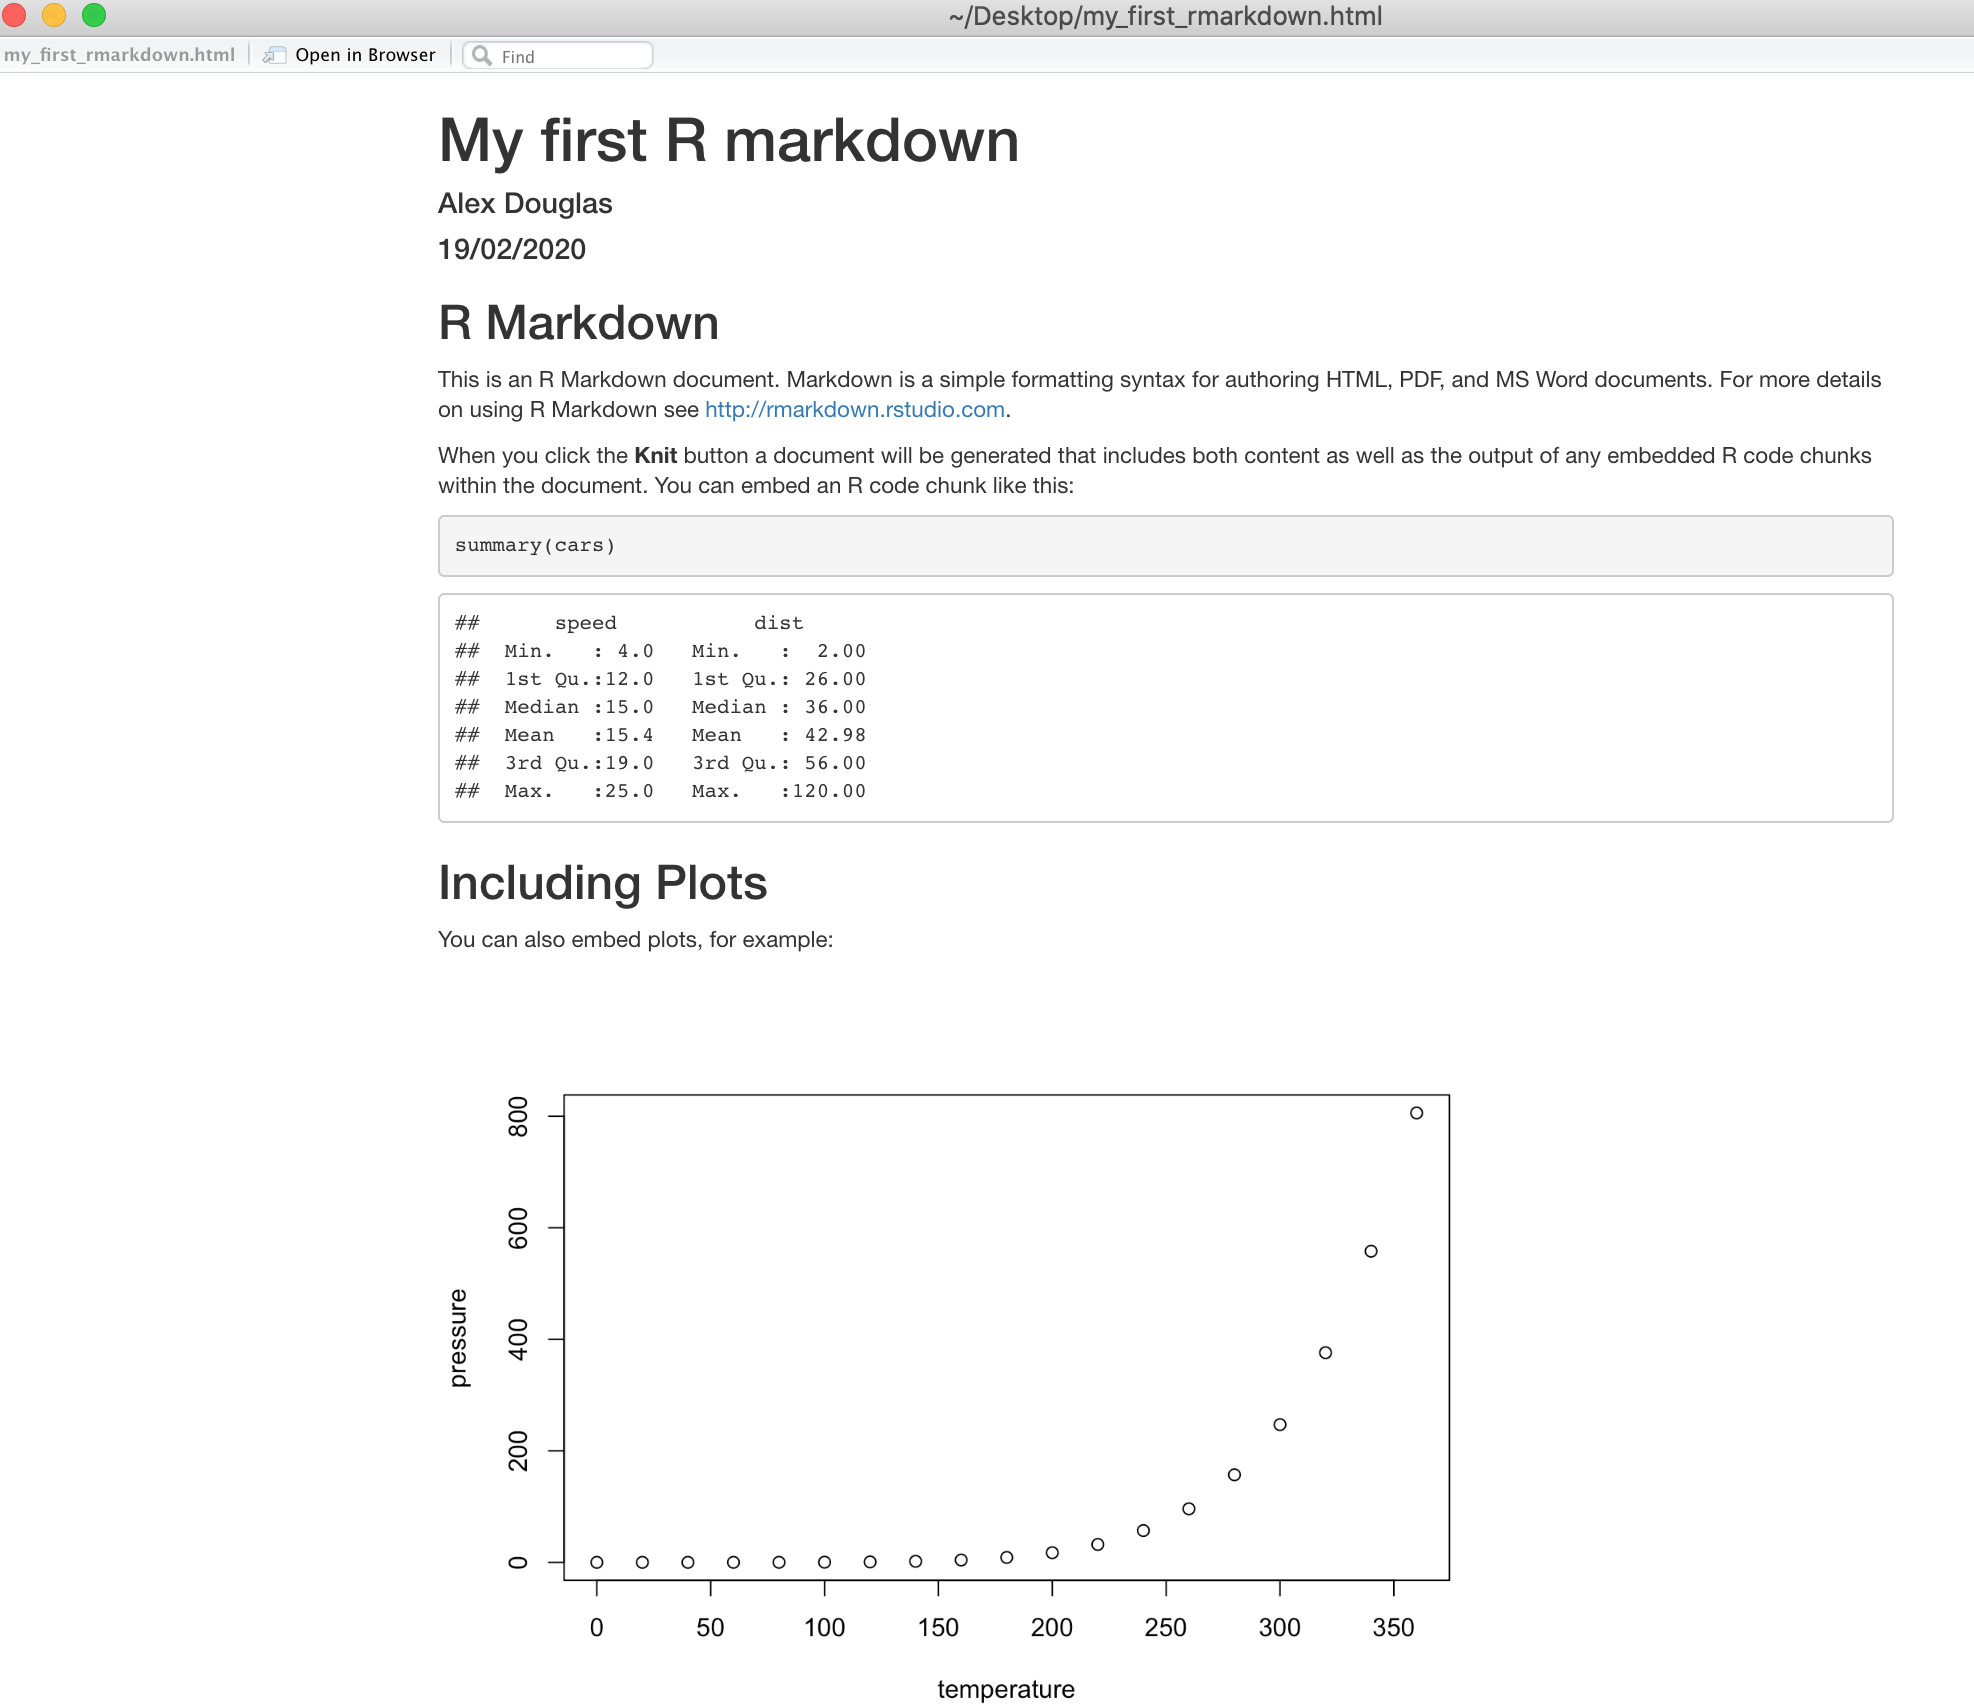
If everything went smoothly a new HTML file will have been created and saved in the same directory as your .Rmd file (ours will be called my_first_rmarkdown.html). To view this document simply double click on the file to open in a browser (like Chrome or Firefox) to display the rendered content. RStudio will also display a preview of the rendered file in a new window for you to check out (your window might look slightly different if you’re using a Windows computer).
Great, you’ve just rendered your first R markdown document. If you want to knit your .Rmd file to a pdf document then all you need to do is choose knit to PDF instead of knit to HTML when you click on the knit icon. This will create a file called my_first_rmarkdown.pdf which you can double click to open. Give it a go!
You can also knit an .Rmd file using the command line in the console rather than by clicking on the knit icon. To do this, just use the render() function from the rmarkdown package as shown below. Again, you can change the output format using the output_format= argument as well as many other options.